✓ Mastering realistic portraits begins with understanding anatomy and facial proportions.
✓ Layering is crucial for achieving depth, smooth transitions, and lifelike skin textures.
✓ Light and shadow are the primary tools for creating three-dimensionality and form.
✓ Practice and patience are more important than innate talent for success in realistic drawing.
How It Works
1
Gather Your Essential Materials
Select quality pencils, paper, and blending tools to ensure your drawing process is smooth and effective. The right tools provide a foundation for realistic results.
2
Understand Proportions and Anatomy
Learn the fundamental rules of facial structure and human anatomy to accurately map out features. This foundational knowledge prevents common distortion errors.
3
Master Light, Shadow, and Form
Practice rendering values to create depth and volume, transforming flat shapes into three-dimensional forms. Observe how light interacts with different surfaces to achieve realism.
4
Refine Details and Textures
Focus on the subtle nuances of skin, hair, and eyes, using fine lines and layered shading to add intricate details. This final stage brings your portrait to life with convincing textures.
The Foundation: Understanding Facial Proportions and Anatomy
Photo: Engin Akyurt / Pexels
To truly learn how to draw realistic portraits step by step, one must first build a robust understanding of the human face's underlying structure. This isn't just about drawing what you see; it's about understanding *why* you see it that way. The human head, at its core, can be simplified into basic geometric shapes, often starting with an egg or sphere. From this foundation, we begin to map out the crucial landmarks. The 'rule of thirds' is a classic starting point, suggesting that the face can be divided into three equal horizontal sections: hairline to brows, brows to base of nose, and base of nose to chin. While a helpful guide, it's essential to remember that individual variations exist, and these are merely average proportions. The eyes, arguably the most expressive feature, are typically positioned halfway down the head, not including the hair. The space between the eyes is roughly the width of one eye. The nose's width often aligns with the inner corners of the eyes, and the corners of the mouth typically align with the pupils.
Beyond these general guidelines, delving into basic cranial anatomy and muscle structure can elevate your portraits from simply 'accurate' to truly 'lifelike.' Understanding how muscles like the orbicularis oculi (around the eyes) and the zygomaticus major (for smiling) affect the skin's surface allows you to render subtle contours and expressions more convincingly. For instance, knowing the brow bone's prominence helps you understand shadow patterns around the eyes, and understanding the jawline's angle informs how light catches the side of the face.
Starting with a light sketch, perhaps using a 2H or HB pencil, map out these major divisions and features. Don't press hard; these are merely guidelines that will be refined and erased later. Focus on the overall shape of the head and the placement of the eyes, nose, and mouth before diving into details. Think of it like an architect laying down a blueprint before constructing a building. This initial structural phase is critical for avoiding common pitfalls such as skewed features or disproportionate heads. Many artists rush this stage, eager to get to the 'fun' part of shading and detailing, but a weak foundation will inevitably lead to an unstable and unconvincing final piece. Take your time, measure carefully (using your pencil as a measuring tool against your reference), and constantly compare your drawing to your reference image. For more advanced techniques in figure drawing, consider exploring human anatomy for artists resources.
Mastering Value and Form: The Art of Light and Shadow
Photo: VAZHNIK / Pexels
Once the foundational structure is established, the next crucial step in how to draw realistic portraits step by step is to breathe life into those lines through the masterful application of value. Value refers to the lightness or darkness of a tone, and it is the single most important element for creating the illusion of three-dimensionality and form on a two-dimensional surface. Without a strong understanding of light and shadow, your portrait will remain flat and cartoonish, regardless of how accurate your initial proportions are. Begin by identifying your light source. Is it direct and harsh, creating crisp shadows, or soft and diffused, leading to subtle transitions? Understanding the light source dictates how shadows fall and how highlights appear.
Start by blocking in the major shadow shapes with a medium tone, perhaps an HB or 2B pencil. Don't think of shadows as just 'dark areas'; think of them as forms that turn away from the light. Look for the 'terminator line' – the distinct edge where light turns into shadow. This line is often sharp on hard edges and softer on rounded forms. As you build up your values, remember the principle of layering. Instead of pressing hard to get dark tones immediately, build them up gradually with multiple layers of lighter pressure. This allows for smoother transitions and greater control over the depth of your shadows. Use a variety of pencils, from hard leads (2H, H) for light tones and initial shading, to softer leads (2B, 4B, 6B) for mid-tones and dark shadows.
Observe the subtle shifts in value even within a shadow area – there are often reflected lights bouncing back into the shadow, making it not uniformly dark. Similarly, highlights aren't just pure white; they have varying intensities. The brightest highlight, or 'specular highlight,' usually appears on glossy surfaces like the eyes or lips. Pay close attention to the form shadows (those on the object itself) and cast shadows (those thrown by the object onto another surface). Cast shadows tend to be darker and have sharper edges closer to the object casting them, gradually softening and lightening as they extend further away. Blending tools like tortillons, blending stumps, or even a soft tissue can help smooth out transitions, but use them judiciously. Over-blending can make a drawing look muddy and lose its texture. The goal is to create a seamless gradient from light to dark, mimicking the way light falls across the complex curves of the human face. This meticulous approach to value is what separates a good portrait from a truly realistic one.
Adding Depth: Texture, Detail, and Expressive Nuances
Photo: Artsy Frame Photography / Pexels
With the structure and values firmly in place, the final stages of learning how to draw realistic portraits step by step involve refining textures, adding intricate details, and capturing the unique expressive nuances that make a person truly come alive on paper. This is where your portrait transitions from a mere representation to a captivating likeness. Focus on the micro-details that define individual features. For the eyes, this means not just drawing the iris and pupil, but also the subtle reflections on the cornea, the delicate lines of the eyelids, and the fine eyelashes. Remember that the iris is not a flat disc; it has depth and texture, often with radial lines emanating from the pupil. The white of the eye (sclera) is rarely pure white; it often has subtle shading and even tiny veins.
Skin texture is another critical element. Avoid making the skin uniformly smooth. While you don't want to exaggerate every pore, subtle variations in tone, tiny wrinkles, and the slight unevenness of the skin's surface contribute immensely to realism. Use very light, short strokes, or even stippling, to suggest these textures rather than explicitly drawing each one. Hair, too, requires a nuanced approach. Instead of drawing individual strands, think of hair in masses and observe how light catches different sections. Build up hair in layers, starting with the darkest underlying tones, then adding mid-tones, and finally using an eraser (like a kneaded eraser or a stick eraser with a sharpened edge) to lift out highlights and suggest individual strands. The direction of the hair growth is paramount for a natural look.
Lips are another area where texture and subtle shading create impact. Observe the vertical lines and slight creases on the lips, and how light reflects off their moist surface. The corners of the mouth often have subtle shadows and folds that convey expression. Finally, consider the expressive nuances. A slight tilt of the head, a subtle arch of an eyebrow, or the way the corners of the mouth turn can convey emotion and personality. These are often the most challenging aspects to capture but are what truly elevate a portrait. Practice observing these subtle cues in your reference images and try to translate them with precision. Don't be afraid to use a sharp eraser to create bright highlights or to clean up edges. The interplay of light, shadow, texture, and expression is what culminates in a truly realistic and compelling portrait. For further development in rendering diverse textures, consider exploring resources on advanced drawing techniques.
Common Pitfalls and Pro Tips for Lifelike Portraits
Photo: AI25.Studio Studio / Pexels
As you embark on the journey of how to draw realistic portraits step by step, you'll inevitably encounter challenges. Being aware of common pitfalls can help you avoid frustration and accelerate your learning. One frequent mistake is drawing features in isolation. Artists often focus intensely on an eye, then move to the nose, without constantly comparing the size, angle, and placement of each feature relative to the others. This leads to disjointed portraits where features don't quite fit together. Always work on the portrait as a whole, moving between features and constantly checking proportions. Another common error is over-blending, which can strip a drawing of its vitality and texture, making it look flat and muddy. Use blending tools sparingly and purposefully, primarily for smooth transitions in skin tone, but allow some pencil marks to remain to convey texture and energy.
Neglecting the background is another pitfall. Even a simple, softly shaded background can help frame the subject and push them forward, adding depth to the overall composition. A stark white background can sometimes make a realistic portrait feel incomplete or like a cutout. Finally, many beginners struggle with impatience, rushing through the initial stages of sketching and value building to get to the details. Remember, a strong foundation is paramount.
**Pro Tips for Achieving Greater Realism:**
* **Use a Grid or Sighting Method:** For beginners, a light grid on both your reference and drawing paper can help with accurate placement of features. More advanced artists can use the sighting method (using your pencil to measure angles and proportions) to achieve similar accuracy.
* **Work from Good References:** High-quality reference photos with clear lighting, good resolution, and interesting expressions are invaluable. Avoid photos with flash glare or poor lighting.
* **Squint Your Eyes:** Squinting helps you simplify the image into major light and shadow shapes, making it easier to identify the overall value structure without getting lost in details.
* **Draw What You See, Not What You Know:** Your brain has preconceived notions of what an eye or nose looks like. Try to suppress these and draw exactly the shapes, values, and lines you observe in your reference, even if they seem unusual.
* **Take Breaks and View from a Distance:** Step away from your drawing frequently. When you return, you'll see it with fresh eyes. Viewing it from a distance or in a mirror can also reveal errors in proportion or symmetry.
* **Embrace Imperfection:** True realism isn't about photographic perfection; it's about capturing the essence and character of the subject, including their unique imperfections. Don't be afraid of slight variations that add to the individuality.
By being mindful of these common mistakes and incorporating these professional tips, your journey to creating truly lifelike and expressive portraits will be much more rewarding.
Comparison
Feature
Graphite Pencils
Charcoal Pencils
Colored Pencils
Digital Tablet
Control & Precision
Excellent (fine detail)
Good (expressive lines)
Good (layering)
Excellent (undo, layers)
Blending Capability
Very Good (smooth blends)
Excellent (rich, soft)
Moderate (wax bloom)
Perfect (seamless)
Achieving Dark Tones
Good (requires layering)
Excellent (deep blacks)
Moderate (build-up)
Perfect (pure black)
Erasability
Very Good (kneaded eraser)
Good (specific erasers)
Limited (stains paper)
Perfect (undo, layer erase)
Learning Curve
Moderate
Moderate to High
Moderate to High
High (software & hardware)
Portability
✓
✓
✓
✗
Cost (Starter Set)
Low
Low to Moderate
Moderate
High
What Readers Say
★★★★★
"This guide completely demystified how to draw realistic portraits step by step for me. The section on facial proportions was a game-changer, and I finally understand how to get the eyes in the right place!"
Sarah J. · Austin, TX
★★★★★
"I've tried many tutorials, but this one's depth on light and shadow is unparalleled. My portraits now have so much more dimension and look genuinely lifelike."
Mark D. · Seattle, WA
★★★★★
"Following these steps, I managed to draw a portrait of my grandmother that brought tears to her eyes. The detail and texture section really helped me capture her unique features."
Emily R. · Boston, MA
★★★★★
"While incredibly comprehensive, some of the advanced anatomy felt a bit daunting at first. However, sticking with the core principles outlined here has still drastically improved my portrait skills."
David L. · Denver, CO
★★★★★
"As a self-taught artist, I always struggled with realism. This guide provided the structured approach I needed to finally understand how to draw realistic portraits step by step, making practice much more effective."
Jessica M. · Miami, FL
Frequently Asked Questions
What are the most essential materials needed to start drawing realistic portraits?
You'll primarily need a good range of graphite pencils (e.g., 2H, HB, 2B, 4B, 6B), quality drawing paper (smooth to medium tooth), a kneaded eraser, a vinyl eraser, a blending stump or tortillon, and a reliable reference image. Starting with these basics will provide a solid foundation for your portrait journey without overwhelming you with too many tools.
Is natural talent required to draw realistic portraits?
Absolutely not. While some individuals may have a natural inclination, drawing realistic portraits is fundamentally a learned skill. It relies on observation, understanding principles like proportion and value, and consistent practice. Anyone willing to dedicate time and effort can achieve impressive results by following structured guidance.
How do I make my portrait subjects look less 'flat' and more three-dimensional?
The key to adding three-dimensionality lies in mastering value – the range of light and shadow. Understand your light source, identify form shadows and cast shadows, and build up tones gradually through layering. This creates the illusion of depth and volume, transforming flat shapes into realistic forms. Avoid uniform shading and focus on smooth transitions.
What's a reasonable amount to invest in good drawing supplies for realistic portraits?
You can start with a quality set of graphite pencils and a drawing pad for around $20-$40. While there are luxury art supplies, excellent results can be achieved with mid-range materials. Investing in good paper and a diverse set of pencils will make a noticeable difference in your ability to render fine details and smooth values.
How do digital portraits compare to traditional pencil portraits in terms of realism?
Both digital and traditional mediums can achieve stunning realism. Digital art offers advantages like undo functions, layers, and a vast array of brushes, which can speed up the process and allow for easier experimentation. Traditional pencil drawing, however, offers a tactile experience and a unique textural quality that many artists and viewers appreciate. The choice often comes down to personal preference and desired workflow.
Who should follow this guide on how to draw realistic portraits step by step?
This guide is ideal for aspiring artists, art students, and hobbyists who are serious about improving their portrait drawing skills and want to achieve lifelike results. It's structured to benefit both beginners seeking a clear path and intermediate artists looking to refine their techniques and deepen their understanding of realism.
Are there any risks of developing bad habits when learning to draw portraits?
A primary risk is rushing the foundational stages (proportions, structure) or relying too heavily on tracing without understanding the underlying forms. This can lead to portraits that look superficially correct but lack depth and understanding. Another risk is over-blending, which can strip away texture. Consistent practice with critical self-evaluation and seeking feedback can help mitigate these risks.
What's the future trend for realistic portrait drawing in the art world?
The future of realistic portrait drawing sees a continued appreciation for both traditional hand-drawn mastery and the integration of digital tools. Artists are increasingly blending hyperrealism with expressive elements, pushing boundaries beyond mere photographic replication. There's also a growing trend towards diverse representation and capturing unique individual stories through portraiture, reflecting a broader societal shift.
Ready to transform your artistic vision into captivating reality? Dive into the world of realistic portraiture by applying these step-by-step techniques and watch as your ability to capture human likeness flourishes with every stroke. Your journey to mastering how to draw realistic portraits step by step starts now.

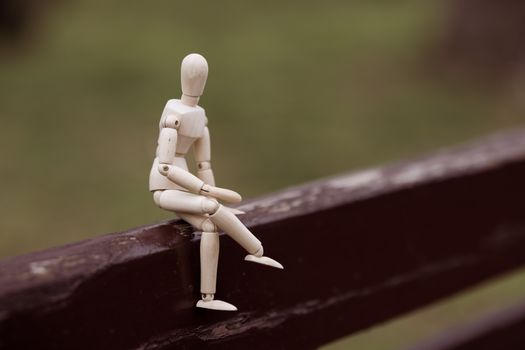 Photo: Engin Akyurt / Pexels
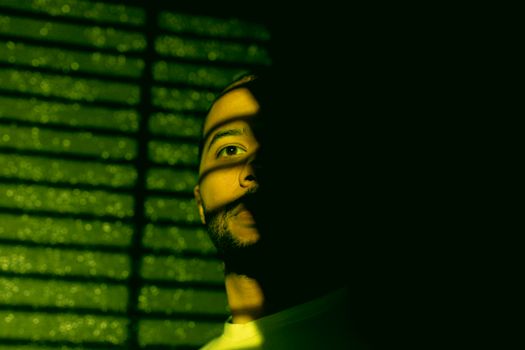 Photo: VAZHNIK / Pexels
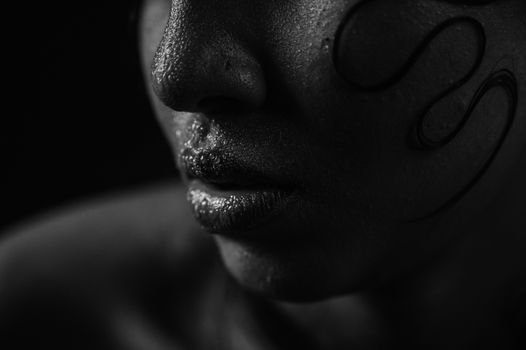 Photo: Artsy Frame Photography / Pexels
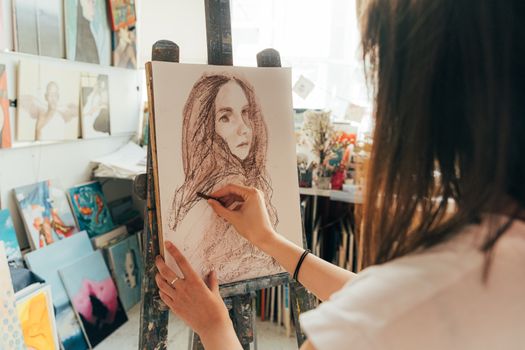 Photo: AI25.Studio Studio / Pexels