✓ Always test cleaning solutions on an inconspicuous area first.
✓ Professional conservation is recommended for valuable or delicate pieces.
✓ Dusting with a soft brush is the safest initial cleaning step.
✓ Water-based solutions can damage unvarnished or poorly varnished paintings.
How It Works
1
Assess the Painting's Condition
Before any cleaning, carefully examine the painting for cracks, flaking paint, or unvarnished areas. This initial assessment dictates the safety and method of cleaning.
2
Gentle Dusting & Surface Cleaning
Begin with the least invasive method: soft dusting. For surface grime, use specialized art sponges or distilled water with extreme caution on varnished surfaces.
3
Targeted Grime Removal (Varnished Only)
For stubborn grime on varnished paintings, consider mild, pH-neutral soaps or specific art cleaning solutions. Apply sparingly and remove quickly, always testing first.
4
Consider Professional Restoration
If the painting is valuable, antique, or exhibits significant damage or deep-seated grime, professional conservators possess the expertise and tools for safe restoration.
Understanding Your Oil Painting: A Foundation for Cleaning
Photo: Antoni Shkraba / AI25.studio / Pexels
Before embarking on the delicate task of how to clean oil paintings, it's paramount to understand the composition and condition of your artwork. Oil paintings are complex layered structures, typically consisting of a support (canvas, wood panel), a ground layer, paint layers, and often a varnish layer. Each of these components can react differently to cleaning agents, and an incorrect approach can lead to irreversible damage. The age of the painting, the type of oil paints used, and the presence and condition of a varnish layer are critical factors. For instance, older paintings, especially those from the 19th century or earlier, may have brittle paint layers or a varnish that has become yellowed and integrated with the paint over time. Attempting to remove this varnish without professional expertise can strip away original paint.
Start by examining your painting in good, natural light. Look for any signs of instability: flaking paint, cracks (craquelure), or areas where the paint is lifting from the support. If you observe any of these, stop immediately. Any cleaning attempt on an unstable painting risks dislodging paint fragments. Also, identify if the painting is varnished. A varnished painting will typically have a somewhat glossy or satin finish, and the surface will feel smoother. Unvarnished paintings, or those with a very thin or degraded varnish, will appear duller and may feel slightly textured. Cleaning an unvarnished painting with any liquid is generally not recommended, as it can directly affect the paint layers.
Another crucial aspect is understanding the type of dirt and grime. Is it superficial dust, accumulated airborne pollutants, or perhaps nicotine stains? Each type of contaminant might require a different approach. Superficial dust can often be removed with very gentle dry methods, while ingrained grime might necessitate a more targeted, albeit cautious, wet cleaning. However, the golden rule remains: when in doubt, do not proceed. The potential for damage far outweighs the desire for a pristine surface. Consulting with a professional art conservator for an initial assessment, especially for valuable or antique pieces, is always the safest first step. They can provide a detailed condition report and recommend the most appropriate cleaning methods, ensuring the longevity and integrity of your artwork. This foundational understanding is the cornerstone of any successful and safe oil painting cleaning endeavor, protecting your investment and preserving artistic heritage. You can learn more about general art conservation techniques to broaden your understanding.
Essential Tools and Techniques for Safe Surface Cleaning
Photo: Tara Winstead / Pexels
Once you've assessed your oil painting and determined it's stable enough for surface cleaning, gathering the right tools is crucial. The goal is always to use the least invasive methods first. For basic dusting, a very soft, natural-bristle brush, like a hake brush or a soft cosmetic brush, is ideal. Avoid anything abrasive or synthetic that could scratch the paint surface. Gently brush across the surface, always moving in the direction of the brushstrokes if possible, to dislodge loose dust and cobwebs. Hold the painting at a slight angle to allow gravity to help the dust fall away. Never press hard or scrub.
For more ingrained surface grime on *varnished* paintings, specialized art sponges, often referred to as 'smoke sponges' or 'dry cleaning sponges,' can be remarkably effective. These vulcanized rubber sponges are designed to lift dry, particulate dirt without introducing moisture. They work by gently dabbing or rolling across the surface, picking up grime. Always use a fresh, clean section of the sponge and discard it once it becomes soiled. This method is excellent for removing soot, nicotine residue, and general atmospheric dirt from varnished surfaces.
When considering liquid cleaning, extreme caution is paramount. For varnished paintings that have accumulated a layer of grime that dry methods cannot remove, distilled water can be used, but only with the utmost care. Never use tap water, as it contains minerals and chemicals that can leave residues or react with the paint. Apply distilled water sparingly to a clean, soft cotton swab (Q-tip). Roll the swab gently over a very small, inconspicuous area first, such as an edge or a dark corner, to observe any reaction. Look for paint coming off on the swab or any discoloration. If the swab remains clean and the surface appears unaffected, you can proceed cautiously, working in small sections.
Always use a fresh swab for each small area and discard it as soon as it shows any sign of dirt. Immediately follow with a second, dry cotton swab to absorb any excess moisture. The key is minimal moisture contact and swift removal. Never saturate the surface or allow water to pool. If you notice any paint coming off, or if the varnish appears to soften or become tacky, stop immediately. This indicates the varnish is either too thin, degraded, or the painting is unvarnished, and further liquid cleaning risks severe damage. Remember, these liquid methods are strictly for removing surface grime *on top of a stable varnish layer*, not for varnish removal itself. Always prioritize the painting's safety over achieving a perfectly clean surface, especially if you are not a trained conservator. The goal is preservation, not transformation.
For more advanced cleaning, such as the use of mild, pH-neutral soaps or specific art cleaning solutions, professional guidance is indispensable. These products can be effective but also carry a higher risk of damage if not used correctly. They are typically reserved for situations where distilled water alone is insufficient and are almost exclusively applied to well-varnished, stable paintings. Always adhere to the manufacturer's instructions for any specialized cleaning product and, again, test on an inconspicuous area first. The principle of 'less is more' is your best guide when cleaning oil paintings, ensuring that your efforts enhance rather than detract from their long-term beauty.
When to Seek Professional Conservation and Restoration
Photo: Tima Miroshnichenko / Pexels
While understanding how to clean oil paintings yourself for superficial dust and grime is valuable, there are definitive circumstances when the only safe and responsible course of action is to entrust your artwork to a professional art conservator. This decision is not a sign of failure but rather a testament to your commitment to the painting's long-term preservation and value. The expertise of a conservator extends far beyond simple surface cleaning; they are trained scientists and artists who understand the complex chemistry of art materials, the historical context of artworks, and the most advanced, reversible conservation techniques.
One of the primary reasons to seek professional help is for varnish removal. Over decades or centuries, the natural resin varnishes traditionally used on oil paintings can yellow, darken, and become brittle, obscuring the original colors and details of the artwork. Removing this aged varnish requires specialized solvents and a precise, controlled environment. An untrained hand attempting varnish removal can easily dissolve paint layers, irreversibly alter the painting's appearance, or leave behind damaging solvent residues. Conservators use highly specific solvent mixtures, often applied under a microscope, to delicately lift the varnish layer without affecting the underlying paint.
Another critical situation demanding professional intervention is when the painting exhibits structural damage. This includes tears or punctures in the canvas, cracks or flaking paint, paint loss, or warping of the support. Conservators are skilled in repairing these damages, consolidating flaking paint, filling losses with reversible materials, and in-painting (retouching) damaged areas to seamlessly integrate with the original artwork. Their repairs are designed to be stable, reversible, and minimally invasive, ensuring the integrity of the original work.
Furthermore, if your painting has suffered from environmental damage, such as water stains, mold growth, smoke damage, or significant discoloration from exposure to light or pollutants, a conservator is essential. They possess the knowledge and tools to address these complex issues, often employing specialized techniques like aqueous cleaning systems, poultices, or even laser cleaning in some cases, which are far beyond the scope of DIY cleaning.
For antique or historically significant paintings, or any artwork of substantial monetary or sentimental value, professional conservation is not just recommended; it's imperative. A conservator can provide a comprehensive condition report, document the entire treatment process, and offer expert advice on proper display and environmental control to prevent future damage. They adhere to strict ethical guidelines, ensuring that all treatments are reversible and that the painting's historical and artistic integrity is maintained. Investing in professional conservation is an investment in the longevity and legacy of your cherished artwork. For more on protecting your art, explore preventative art care.
Common Mistakes to Avoid and Best Practices for Longevity
Photo: Anastasia Shuraeva / Pexels
When learning how to clean oil paintings, knowing what *not* to do is as crucial as knowing what to do. Many well-intentioned cleaning attempts end in irreversible damage. One of the most common and catastrophic mistakes is using household cleaning products. Ammonia-based cleaners, abrasive scrubs, furniture polish, or even harsh soaps are absolutely detrimental to oil paint and varnish. These products can strip paint, leave chemical residues, cause discoloration, or accelerate the degradation of the artwork. Always stick to art-specific, pH-neutral solutions if you're venturing beyond distilled water, and only after extensive testing.
Another frequent error is applying too much pressure or scrubbing aggressively. Oil paint layers can be surprisingly delicate, especially on older works. Scrubbing can abrade the paint, remove glazes, or even lift entire sections of paint. Always use a gentle, rolling, or dabbing motion with soft materials. Similarly, never use paper towels, rough cloths, or sponges not specifically designed for art cleaning, as these can scratch the surface.
Over-saturating the painting with liquid is another significant risk. Excess moisture can seep into cracks, swell the canvas, or react with underlying paint layers, leading to blistering, delamination, or mold growth. Always use minimal amounts of liquid on a cotton swab and dry immediately with another swab.
Ignoring the varnish layer is also a common pitfall. Cleaning an unvarnished painting with liquids is highly risky, as you're directly interacting with the paint. If you're unsure if a painting is varnished, assume it's not and stick to dry cleaning methods, or consult a professional. Attempting to remove old, yellowed varnish yourself is another major mistake; this is a complex chemical process best left to conservators.
**Best Practices for Longevity:**
* **Regular Gentle Dusting:** Use a soft, natural-bristle brush to lightly dust your paintings every few months. This prevents dust accumulation from becoming ingrained grime.
* **Stable Environment:** Display your paintings in a stable environment. Avoid direct sunlight, extreme temperature fluctuations, and high humidity, which can cause cracking, fading, and mold growth.
* **Proper Framing:** Ensure paintings are properly framed and glazed (with UV-protective glass/acrylic for valuable works) to protect them from physical damage and environmental factors.
* **Handle with Care:** Always handle paintings by the frame, not the canvas or panel. Wear clean gloves to avoid transferring oils from your skin.
* **Avoid DIY Varnish Removal:** Never attempt to remove old varnish yourself. This is a highly specialized task for conservators.
* **Professional Assessment:** For valuable or antique pieces, periodic professional assessments can identify potential issues before they become severe.
* **Documentation:** Keep records of your painting's condition, any cleaning you perform, and professional treatments. This history is valuable for future conservation efforts.
By avoiding these common mistakes and adopting best practices, you can significantly extend the life and beauty of your oil paintings, ensuring they remain cherished artworks for generations to come.
Comparison
Feature
Professional Conservator
DIY Gentle Cleaning (Varnished Only)
DIY Aggressive Cleaning (Not Recommended)
Varnish Removal
✓ (Safe & Expert)
✗ (High Risk)
✗ (Catastrophic Risk)
Structural Repair
✓ (Specialized)
✗ (Impossible)
✗ (Worsens Damage)
Deep Grime/Stain Removal
✓ (Targeted Solvents)
Limited (Surface Only)
✗ (Causes Damage)
Cost
High (Investment)
Low (Supplies)
Potentially Higher (Repair Costs)
Risk of Damage
Minimal (Trained)
Low (If Cautious)
Extremely High
Expertise Required
Extensive Training
Basic Knowledge
None (Leads to Damage)
What Readers Say
★★★★★
"This guide on how to clean oil paintings was incredibly thorough. I used the gentle dusting method on an old family portrait, and it looks so much brighter without any damage. The advice on testing first was a lifesaver."
Eleanor Vance · New York, NY
★★★★★
"I had a painting with some surface grime, and the dry cleaning sponge technique recommended here worked wonders on my varnished piece. It's amazing how much brighter the colors are now, and I felt confident following the step-by-step instructions."
Marcus Chen · Los Angeles, CA
★★★★★
"After reading this, I realized my antique painting needed professional help for its yellowed varnish. The article clearly explained when to call a conservator, and the result was a stunning restoration that revealed the original vibrancy."
Sophia Rodriguez · Miami, FL
★★★★★
"The information on understanding the painting's layers and the risks involved was very insightful. I successfully cleaned a small, modern oil painting using distilled water on a swab, but I'm glad I didn't attempt it on my older, more delicate pieces."
David Miller · Chicago, IL
★★★★★
"As an art collector, knowing how to clean oil paintings safely is paramount. This guide provides a balanced approach, distinguishing between DIY and professional tasks. It's now my go-to resource for basic maintenance."
Patricia Green · Houston, TX
Frequently Asked Questions
What is the safest way to clean an oil painting at home?
The safest initial step is always gentle dry dusting with a very soft, natural-bristle brush. For varnished paintings with surface grime, specialized art dry-cleaning sponges can be used. Any liquid cleaning, even with distilled water, should only be attempted on stable, varnished paintings in inconspicuous areas first, with extreme caution and minimal moisture.
Can I use water to clean my oil painting?
Distilled water can be used on *stable, varnished* oil paintings to remove surface grime, but only with extreme caution. Apply it sparingly with a cotton swab, test an inconspicuous area first, and immediately dry with another swab. Never use tap water or saturate the painting, especially if it's unvarnished or has flaking paint, as this can cause irreversible damage.
How do I remove yellowed varnish from an old oil painting?
Removing yellowed varnish from an old oil painting is a highly specialized and delicate process that should *only* be performed by a professional art conservator. Attempting to remove varnish yourself with solvents can easily damage or remove the original paint layers, leading to irreversible destruction of the artwork.
Is professional oil painting cleaning expensive?
The cost of professional oil painting cleaning and restoration varies widely depending on the painting's size, condition, the type of treatment required (e.g., surface cleaning, varnish removal, structural repair), and the conservator's expertise. While it can be a significant investment, it's often essential for preserving valuable or cherished artworks and can prevent more costly damage down the line.
What's the difference between cleaning and restoration for oil paintings?
Cleaning typically refers to the removal of superficial dirt, dust, and grime from the painting's surface. Restoration, a broader term, involves more extensive interventions such as varnish removal, repairing tears, consolidating flaking paint, filling losses, and in-painting. Cleaning is often a component of restoration, but restoration addresses structural and aesthetic damage beyond simple surface dirt.
Who should clean my valuable or antique oil painting?
For any valuable, antique, or historically significant oil painting, cleaning and restoration should always be performed by a professional art conservator. They possess the specialized knowledge, tools, and ethical guidelines to ensure the artwork's integrity and longevity without causing damage.
Are there any risks associated with cleaning oil paintings myself?
Yes, there are significant risks, including scratching the paint surface, dissolving paint layers, causing discoloration, introducing moisture damage (blistering, mold), or leaving chemical residues. Incorrect cleaning methods can lead to irreversible damage, significantly diminishing the painting's aesthetic and monetary value. Always proceed with extreme caution and when in doubt, consult a professional.
How can I prevent my oil painting from getting dirty again after cleaning?
To prevent future dirt accumulation, display your oil painting in a stable environment away from direct sunlight, sources of smoke (fireplaces, smoking), and areas with high humidity or temperature fluctuations. Regular, gentle dusting with a soft brush can also help prevent dust from becoming ingrained grime. Consider UV-protective glazing for added protection against environmental factors.
Mastering how to clean oil paintings is an art in itself, demanding patience, knowledge, and respect for the artwork. By following these guidelines, you can safely maintain your cherished pieces, but remember that for complex issues or valuable works, a professional conservator is your painting's best friend. Preserve your artistic legacy with confidence and care.

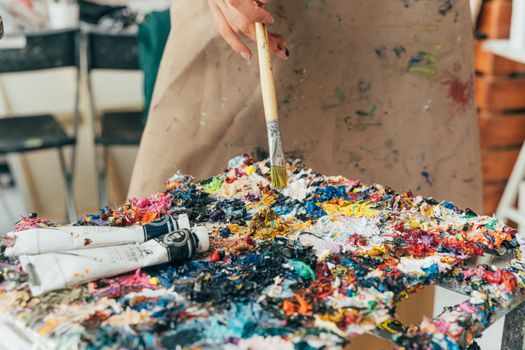 Photo: Antoni Shkraba / AI25.studio / Pexels
 Photo: Tara Winstead / Pexels
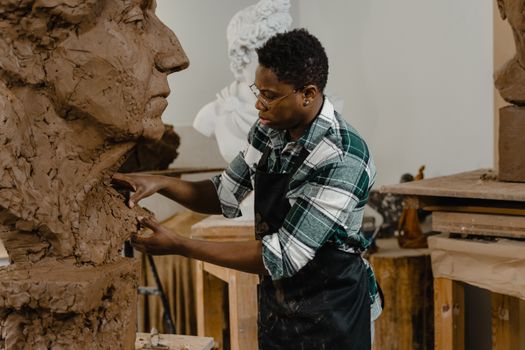 Photo: Tima Miroshnichenko / Pexels
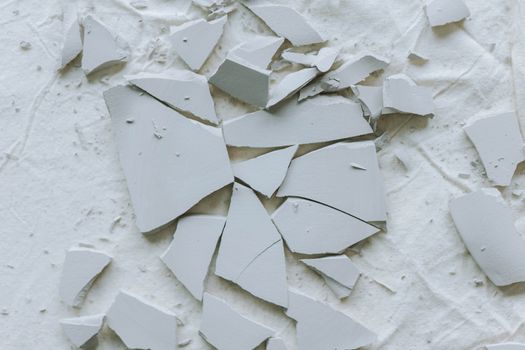 Photo: Anastasia Shuraeva / Pexels