✓ Always test cleaning solutions on an inconspicuous area first.
✓ Never use household cleaners or abrasive materials on oil paintings.
✓ Professional conservators are recommended for valuable or damaged artworks.
✓ Regular dusting with a soft brush can prevent dirt buildup.
How It Works
1
Assess the Painting's Condition
Before attempting any cleaning, thoroughly inspect the painting for cracks, flaking paint, or previous repairs. This initial assessment guides your approach and identifies potential risks.
2
Gentle Surface Dusting
Begin by carefully removing loose surface dust and cobwebs using a very soft, natural-bristle brush. Work gently and avoid applying any pressure to the canvas.
3
Targeted Spot Cleaning (If Necessary)
For localized grime, use a specialized art cleaner applied sparingly with a cotton swab, rolling it across the surface. Never rub, as this can damage the paint layer.
4
Professional Consultation for Deep Cleaning
For extensive dirt, smoke damage, or yellowed varnish, consult a professional art conservator. Their expertise is crucial for preserving the artwork's integrity and value.
Understanding the Delicate Nature of Oil Paintings and Why Cleaning Matters
Photo: Steve A Johnson / Pexels
Oil paintings are not merely decorative items; they are historical artifacts, artistic expressions, and often significant financial investments. Their longevity depends heavily on proper care, and cleaning is a critical, yet often misunderstood, aspect of this stewardship. Unlike many household items, an oil painting cannot simply be wiped down with a damp cloth or sprayed with a general-purpose cleaner. The layers of paint, binder, and varnish are complex chemical structures that react unpredictably to harsh substances. Over time, oil paintings accumulate a myriad of contaminants: dust, dirt, grime, nicotine stains from smoke, cooking residues, and even airborne pollutants. These layers not only obscure the original colors and details, diminishing the artwork's aesthetic appeal, but they can also actively degrade the paint surface. Dust, when combined with humidity, can become abrasive, scratching the delicate varnish or paint layers. Environmental pollutants can cause chemical reactions that lead to discoloration, embrittlement, or even flaking. Furthermore, a yellowed or darkened varnish layer, a common occurrence in older paintings, can dramatically alter the artist's intended palette, making bright blues appear green or vibrant reds appear muddy. Cleaning, therefore, is not just about aesthetics; it's about preserving the artwork's integrity, revealing its true brilliance, and ensuring its survival for future generations. However, the process is fraught with peril for the uninitiated. Incorrect cleaning methods can cause irreversible damage, such as paint loss, discoloration, or weakening of the canvas. This section aims to equip you with the foundational knowledge necessary to approach the task with the respect and caution it demands, guiding you towards understanding when and how to intervene, or, more importantly, when to seek professional help. The goal is always to enhance, not harm, the artwork. Understanding the various layers of an oil painting – the canvas support, the gesso ground, the multiple layers of oil paint, and the protective varnish – is paramount. Each layer has its own vulnerabilities and reactivities. The varnish, while protective, is often the first layer to yellow or accumulate grime. Beneath it, the paint layers themselves can be sensitive to solvents, especially if the painting is relatively new or if the paint has not fully cured. The age of the painting also plays a significant role. Older paintings, particularly those from centuries past, often have brittle canvases and paint that is prone to cracking or flaking. Their original varnishes might be based on natural resins that react differently to modern cleaning agents than synthetic varnishes. Therefore, a one-size-fits-all approach to cleaning is not only ineffective but potentially disastrous. The decision to clean an oil painting should never be taken lightly. It requires careful consideration of the painting's condition, its age, its value (both monetary and sentimental), and the type of dirt or discoloration present. This comprehensive guide will walk you through the nuances, offering practical advice while continually emphasizing the importance of caution and professional consultation.
Essential Tools and Materials for Safe Surface Cleaning
Photo: Negative Space / Pexels
Before you even think about touching your precious artwork, gathering the right tools is paramount. Using inappropriate materials can cause irreparable damage, turning a simple cleaning task into a costly restoration project. The emphasis here is on 'gentle' and 'specialized.' Forget about household sponges, paper towels, or strong chemical cleaners – these are absolute no-gos for oil paintings. Your toolkit should be assembled with the utmost care, prioritizing materials that are soft, non-abrasive, and chemically inert. First and foremost, you will need several very soft, natural-bristle brushes. Think along the lines of a high-quality artist's hake brush or a soft cosmetic brush. The bristles should be fine enough to dislodge dust without scratching the delicate surface of the painting. Never use synthetic brushes, as their bristles can be too stiff. A soft, lint-free cloth, such as a microfiber cloth specifically designed for delicate surfaces, is also essential. These cloths can gently pick up dust without leaving behind fibers. For any localized spot cleaning, you'll require cotton swabs (Q-tips) – ensure they are 100% cotton and tightly wound to prevent stray fibers. Distilled water is another critical component. Tap water contains minerals and chemicals that can leave residues or react with the painting's surface over time. Distilled water is pure and much safer for delicate cleaning tasks. However, it's crucial to understand that water alone is rarely sufficient for significant grime and can even be detrimental if not used correctly. For more stubborn surface grime, specialized art cleaning solutions are available. These are typically pH-neutral, solvent-free, and formulated specifically for oil paintings. Products like saliva substitutes (often used by conservators for targeted grime removal), or specific art cleaning gels, can be effective. Always purchase these from reputable art supply stores or conservation suppliers. Never improvise with household cleaners, even mild ones like dish soap, as their chemical composition can be harmful. A soft artist's eraser, specifically a kneaded eraser (often used for charcoal drawings), can sometimes be carefully dabbed onto very localized surface dirt, but this requires extreme caution and should only be attempted on robust, well-varnished surfaces. Finally, a clean, dry work surface and good lighting are indispensable. You need to be able to clearly see what you are doing and avoid accidental bumps or spills. Lay down a clean sheet or towel to protect both the painting and your workspace. Remember, the philosophy here is 'less is more.' Start with the gentlest method possible and only escalate if absolutely necessary, always testing on a small, inconspicuous area first. This meticulous preparation ensures that when you do begin the cleaning process, you are equipped to do so with minimal risk to the artwork. The investment in proper tools is a small price to pay for the preservation of a valuable piece of art.
Step-by-Step Guide to Gentle Surface Cleaning and Varnish Assessment
Photo: Huy Nguyễn / Pexels
Embarking on the journey of cleaning an oil painting requires patience, a steady hand, and meticulous attention to detail. This section outlines the safest methods for gentle surface cleaning, focusing on dust and light grime, and guides you through assessing the varnish layer – a crucial step before considering deeper cleaning. Remember, if at any point you feel unsure or encounter resistance, stop immediately and consult a professional conservator.
**1. Initial Inspection and Documentation:** Before touching the painting, conduct a thorough visual inspection. Note any existing damage: cracks, flaking paint, punctures, or areas of previous repair. Take high-resolution photographs from various angles, both before and after any cleaning attempts. This documentation is vital for tracking changes and for any future professional interventions. Ensure the painting is securely placed on a clean, stable surface, preferably propped at a slight angle for better visibility.
**2. Gentle Dust Removal:** This is the safest and often most effective first step. Using a very soft, natural-bristle brush (like a large cosmetic brush or a hake brush), gently brush the entire surface of the painting. Hold the brush at an angle and use light, feathery strokes. Do not press down. Work from top to bottom to allow dust to fall away. For stubborn dust in textured areas, you can very gently use a soft, lint-free cloth, dabbing rather than rubbing. Never use a vacuum cleaner directly on a painting, as the suction can dislodge paint or cause damage.
**3. Assessing the Varnish Layer:** The varnish is a protective layer applied over the dried oil paint. Over time, it can yellow, darken, or become cloudy, obscuring the original colors. To assess its condition, observe the painting under different lighting conditions. Does it have a uniform sheen? Are there areas of dullness or excessive gloss? A yellowed varnish will often make white areas appear cream or yellow. This assessment is crucial because removing or cleaning varnish is a highly specialized task.
**4. Targeted Spot Cleaning for Light Grime (with extreme caution):** For very light, localized grime that brushing didn't remove, you might consider a highly diluted, pH-neutral art cleaning solution, or even distilled water. However, this step is risky and should only be attempted on robust, well-varnished paintings, and *always* with a patch test.
* **Patch Test:** Dip a clean cotton swab into the solution, then roll it gently (do not rub!) on a tiny, inconspicuous area, such as the very edge of the painting or a dark, thick area of paint. Observe the swab for any color transfer (indicating paint removal) or changes to the painting's surface. If any color comes off or the surface appears dull or sticky, stop immediately.
* **Application:** If the patch test is successful, use *fresh* cotton swabs for each small area. Lightly dampen (not soak) a swab with the solution. Gently roll the swab across a small section of grime. Do not apply pressure. Immediately follow with a fresh, distilled-water-dampened swab to rinse, then a dry swab to blot. Work in very small sections, replacing swabs frequently to avoid redistributing dirt.
**5. Drying:** Allow the painting to air dry completely in a dust-free environment. Do not use heat or direct sunlight.
**Warning:** If you suspect the painting is unvarnished, if the paint is flaking, or if you see any color on your swab during a patch test, cease all cleaning efforts and contact a professional conservator. Attempting to clean an unvarnished painting or one with unstable paint layers can cause irreversible damage. The goal is always to be conservative and prioritize the artwork's long-term preservation over immediate aesthetic improvement. Remember, many historical works of art have been ruined by well-intentioned but misguided cleaning attempts by amateurs. When in doubt, always defer to expert opinion. For more information on professional art care, visit reputable art conservation resources.
When to Call a Professional: Recognizing Limitations and Avoiding Costly Mistakes
Photo: Tima Miroshnichenko / Pexels
While gentle surface cleaning of an oil painting can be a rewarding task for the careful enthusiast, there are distinct boundaries beyond which professional intervention becomes not just advisable, but absolutely essential. Recognizing these limitations is perhaps the most critical aspect of responsible art ownership. Attempting advanced cleaning or restoration techniques without proper training, tools, and understanding of art chemistry can lead to irreversible damage, significantly diminishing both the aesthetic and monetary value of your artwork. One of the primary reasons to call a professional conservator is for **varnish removal or extensive varnish cleaning**. As discussed, varnish yellows and darkens over time, obscuring the painting's true colors. However, removing old varnish is a highly complex process involving specific solvents that must be carefully selected and applied to dissolve the varnish layer without affecting the underlying paint. This requires an in-depth knowledge of historical varnishes, paint compositions, and solvent chemistry. A conservator uses specialized equipment, such as microscopes, to monitor the process meticulously, ensuring only the varnish is removed. An amateur attempt can easily dissolve paint, leave patchy residues, or even cause chemical reactions that permanently alter the pigments. Another clear indicator for professional help is the presence of **flaking or unstable paint**. If you observe paint lifting, cracking severely, or appearing powdery, any attempt at cleaning, even gentle dusting, can cause further paint loss. A conservator will first stabilize these areas, often using specialized adhesives, before attempting any cleaning. Similarly, **structural damage** to the canvas or panel, such as tears, punctures, warping, or insect damage, requires professional repair. These issues need to be addressed before any surface treatment, as cleaning a structurally compromised painting can exacerbate the damage. **Mold or mildew growth** is another serious concern. While a conservator might carefully remove superficial mold spores, extensive fungal growth can penetrate the paint layers and pose health risks. Specialized fungicides and controlled environmental conditions are often necessary for effective treatment without harming the artwork. Finally, if your painting has suffered from **smoke damage, extensive water damage, or has been exposed to harsh chemicals**, a professional conservator is the only option. These types of damage often involve deep penetration of contaminants into the paint layers, requiring sophisticated cleaning techniques and materials that are simply not available or safe for home use. A conservator also understands the ethical considerations of restoration – the goal is always to preserve the artist's original intent and the painting's historical integrity, not to 'over-restore' or make it look brand new if that means losing valuable historical evidence. They work within established conservation principles, ensuring treatments are reversible and well-documented. While the cost of professional conservation can be significant, it is an investment in the longevity and value of your artwork. Consider it akin to specialized medical care for a cherished family member. For any painting of significant sentimental or monetary value, or if you have any doubt about the nature of the grime or the stability of the painting, the safest and most responsible course of action is always to seek the expert opinion and services of a qualified art conservator. Look for conservators who are members of professional organizations like the American Institute for Conservation of Historic and Artistic Works (AIC), ensuring they adhere to rigorous ethical and professional standards.
Common Mistakes to Avoid and Best Practices for Long-Term Preservation
Even with the best intentions, several common mistakes can lead to irreparable damage when cleaning oil paintings. Being aware of these pitfalls is just as important as knowing the correct procedures. Beyond cleaning, adopting best practices for long-term preservation will ensure your artwork remains vibrant for generations.
**Common Mistakes to Avoid:**
* **Using Household Cleaners:** This is the cardinal sin of oil painting care. Products like Windex, furniture polish, dish soap, or even mild detergents contain chemicals (ammonia, harsh surfactants, solvents, silicones) that can strip varnish, dissolve paint, leave sticky residues, or cause chemical reactions leading to discoloration and brittleness over time. Their pH levels are often unsuitable for delicate art materials.
* **Rubbing Instead of Dabbing/Rolling:** Aggressive rubbing, especially with a cloth or cotton swab, can abrade the paint surface, remove paint layers, or push dirt deeper into cracks. Always use a gentle dabbing or rolling motion when applying any solution.
* **Using Too Much Liquid:** Over-saturating a cotton swab or cloth can introduce excessive moisture to the canvas or panel, leading to swelling, warping, or even mold growth, particularly if the moisture penetrates cracks in the paint or varnish.
* **Ignoring Patch Tests:** Skipping the patch test is a direct path to potential disaster. Even professional conservators perform tests. Different paints, varnishes, and even dirt compositions react differently, and a test area reveals these reactions before widespread damage occurs.
* **Using Abrasive Materials:** Anything from rough cloths to stiff brushes, paper towels, or even a fingernail can scratch or gouge the delicate surface of an oil painting.
* **Cleaning Unvarnished Paintings:** Attempting to clean an unvarnished painting with any liquid is extremely risky, as the paint surface is directly exposed and highly susceptible to damage and absorption of cleaning agents.
* **Ignoring Flaking Paint:** Cleaning a painting with active flaking paint will almost certainly lead to further paint loss. Stabilization must always precede cleaning.
* **Over-Cleaning:** Sometimes, a painting doesn't need deep cleaning, just dusting. Excessive or unnecessary cleaning can reduce the longevity of the artwork by removing original layers or causing cumulative stress.
**Best Practices for Long-Term Preservation:**
* **Maintain Stable Environmental Conditions:** Oil paintings thrive in stable environments. Ideal conditions are generally a temperature of 68-72°F (20-22°C) and relative humidity between 45-55%. Avoid extreme fluctuations, as these cause the canvas and paint layers to expand and contract, leading to cracking and flaking.
* **Avoid Direct Sunlight and Harsh Lighting:** UV radiation from direct sunlight can fade pigments and embrittle the canvas and varnish over time. Display paintings in areas with indirect, diffused light. If using artificial lighting, opt for UV-filtered bulbs or LED lights.
* **Proper Framing and Backing:** Ensure your painting is properly framed with adequate spacing between the painting surface and the glass (if applicable). A backing board (acid-free foam core or corrugated plastic) should be installed behind the canvas to protect it from dust, insects, and physical damage from the rear.
* **Regular, Gentle Dusting:** As mentioned, routine, gentle dusting with a soft, natural-bristle brush can prevent the buildup of grime that necessitates deeper cleaning later.
* **Handle with Care:** Always handle paintings by the frame, not the canvas. Wear clean cotton gloves if you must touch the canvas or stretcher bars to avoid transferring oils and dirt from your hands.
* **Avoid Storing in Attics or Basements:** These areas are prone to extreme temperature and humidity fluctuations, as well as pests, making them unsuitable for art storage.
* **Professional Inspection:** Consider having valuable paintings inspected periodically (e.g., every 5-10 years) by a professional conservator. They can identify subtle signs of degradation and recommend preventative measures before serious damage occurs.
* **Documentation:** Keep detailed records of your artwork, including purchase information, photographs, and any conservation treatments it has undergone. This documentation is invaluable for insurance purposes and future care. By adhering to these best practices and understanding the critical mistakes to avoid, you can significantly extend the life and beauty of your cherished oil paintings, ensuring their legacy endures.
Comparison
Feature
Professional Conservator
DIY Surface Clean (Gentle)
DIY Deep Clean (Risky)
Varnish Removal
Yes (specialized solvents)
No (irreversible damage risk)
No (high damage risk)
Flaking Paint Repair
Yes (stabilization techniques)
No (causes more loss)
No (causes more loss)
Deep Grime/Smoke Removal
Yes (microscopic control)
Limited (surface only)
No (potential for streaks, damage)
Cost
High
Low
Low (but high potential for damage cost)
Risk of Damage
Minimal (expert knowledge)
Low (if done correctly)
Extremely High
Expertise Required
Extensive (years of training)
Basic (caution, research)
Advanced (not recommended for amateurs)
Tools Used
Specialized, scientific
Soft brushes, cotton swabs
Household items (not recommended)
What Readers Say
★★★★★
"This guide was incredibly helpful for learning how to clean oil paintings. I followed the gentle dusting steps for my grandmother's landscape, and the colors immediately looked brighter without any risk. It really emphasizes caution."
Eleanor Vance · Boston, MA
★★★★★
"I was about to use a damp cloth on an old portrait, but reading this stopped me just in time. The advice on patch testing and when to call a professional for how to clean oil paintings saved me from a huge mistake. Highly recommend!"
Marcus Chen · Seattle, WA
★★★★★
"After reading this article, I decided to send my valuable antique oil painting to a professional conservator instead of trying to clean it myself. The results were stunning, and I have peace of mind knowing it was done right."
Sarah Jenkins · Austin, TX
★★★★★
"The information on understanding varnish and the specific tools needed for how to clean oil paintings was excellent. While I still hesitate to do anything beyond dusting, I feel much more informed about my options."
David Miller · Chicago, IL
★★★★★
"As an artist, I found the preservation tips for how to clean oil paintings invaluable. It's not just about cleaning, but about ensuring the longevity of the artwork from creation to display. A truly comprehensive resource."
Isabella Rossi · Miami, FL
Frequently Asked Questions
What is the safest way to remove dust from an oil painting?
The safest method is to use a very soft, natural-bristle brush (like a large, clean cosmetic brush or an artist's hake brush). Gently brush the surface in light, feathery strokes, working from top to bottom. Avoid pressing down or using any abrasive materials.
Can I use water to clean my oil painting?
Using plain distilled water on a cotton swab can be used for very light, localized surface grime on well-varnished paintings, but only after a successful patch test on an inconspicuous area. Tap water is not recommended due to minerals and chemicals. Never use excessive water or soak the painting.
How do I know if my oil painting needs professional cleaning?
If your painting has extensive yellowing or darkening of the varnish, deep-seated grime, smoke damage, flaking paint, or structural damage, it requires professional attention. Any cleaning beyond gentle dusting or very light spot cleaning should ideally be handled by a qualified art conservator.
Is professional oil painting cleaning expensive?
The cost of professional oil painting cleaning and restoration varies widely depending on the size of the painting, the extent and type of damage, and the conservator's expertise. While it can be a significant investment, it often ensures the long-term preservation and value of the artwork, making it a worthwhile expense for valuable or cherished pieces.
What's the difference between cleaning and restoring an oil painting?
Cleaning primarily involves removing surface dirt, grime, and discolored varnish layers to reveal the original colors. Restoration goes further, addressing structural damage (tears, punctures), paint loss (inpainting), and stabilization of unstable paint, aiming to return the artwork to its original aesthetic and structural integrity.
Who should attempt to clean an oil painting?
Anyone can perform very gentle surface dusting with a soft brush. However, any liquid-based cleaning, especially involving solvents or varnish removal, should only be attempted by experienced professionals or under their direct guidance. For valuable or antique paintings, always consult a professional conservator.
Are there any chemicals that are safe to use for how to clean oil paintings?
Generally, no household chemicals are safe. Specialized art cleaning solutions formulated for oil paintings and sold by reputable art conservation suppliers are designed to be pH-neutral and less aggressive than common cleaners. However, even these require careful use and patch testing, and are best applied by those with experience.
How does humidity affect oil paintings and their cleaning?
High humidity can cause canvas to slacken, paint to swell, and encourage mold growth, while low humidity can make paint and canvas brittle. Extreme fluctuations can lead to cracking and flaking. During cleaning, high humidity can slow drying and increase the risk of moisture absorption, making stable environmental conditions crucial.
Armed with this comprehensive guide on how to clean oil paintings, you are now better equipped to care for your valuable artworks. Remember, patience, caution, and knowing when to seek professional help are your greatest assets in preserving these timeless treasures for future generations.

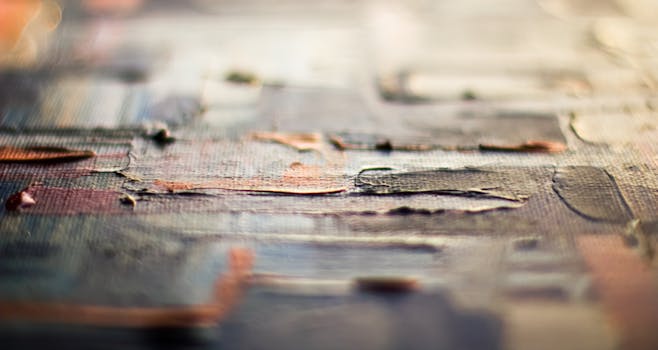 Photo: Steve A Johnson / Pexels
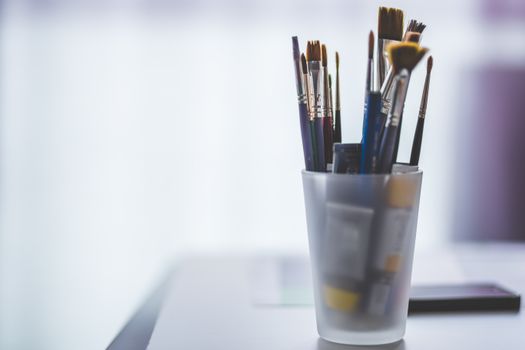 Photo: Negative Space / Pexels
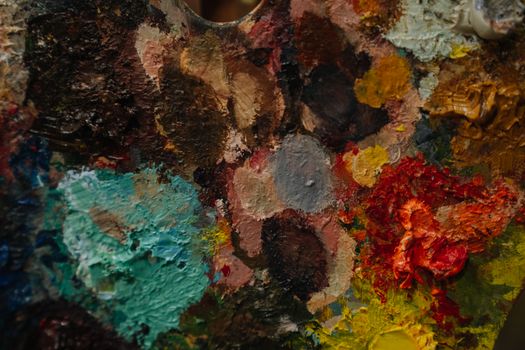 Photo: Huy Nguyễn / Pexels
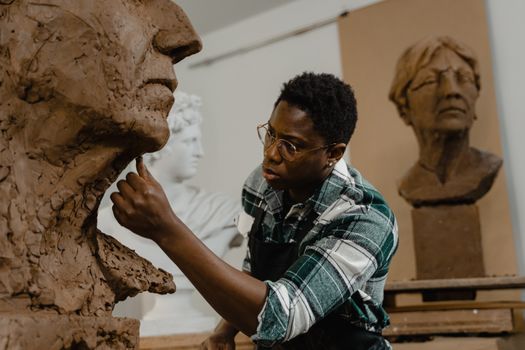 Photo: Tima Miroshnichenko / Pexels