Essential Art Supplies for Oil Painting: Your Ultimate Guide
art supplies for oil painting

Essential Art Supplies for Oil Painting: Your Ultimate Guide

Discover the fundamental tools and materials you need to start or elevate your oil painting journey today.

Start Painting Now

Key Takeaways

  • ✓ Oil paints offer rich, vibrant colors and a long drying time, allowing for extensive blending and layering.
  • ✓ Quality brushes are crucial for achieving various strokes and textures in oil painting.
  • ✓ Proper ventilation is essential when working with solvents and mediums used in oil painting.
  • ✓ Investing in artist-grade supplies can significantly impact the longevity and appearance of your artwork.

How It Works

1
Gather Your Core Materials

Begin by selecting your oil paints, brushes, and a suitable surface. These foundational items will dictate your initial painting experience.

2
Prepare Your Workspace

Set up a well-ventilated area with an easel, palette, and cleaning supplies. Organization and safety are key for an enjoyable session.

3
Learn Basic Techniques

Experiment with color mixing, brushstrokes, and layering. Understanding these fundamentals will build your confidence and skill.

4
Practice and Experiment

Regular practice is vital for improvement. Don't be afraid to try new approaches and embrace the learning process.

Understanding Oil Paints: Brands, Pigments, and Grades
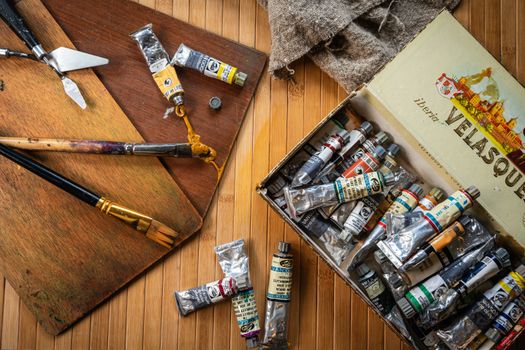
Artistic setup featuring various paint tubes, brushes, and tools on a wooden surface. Photo: Ylanite Koppens / Pexels
Embarking on your oil painting journey begins with understanding the very heart of the medium: the paints themselves. Oil paints are renowned for their luminous colors, buttery consistency, and extended drying times, which afford artists unparalleled opportunities for blending, layering, and subtle color transitions. But not all oil paints are created equal, and knowing the differences can significantly impact your artistic outcome and budget. Primarily, oil paints are categorized into two main grades: student grade and artist grade. Student-grade paints, as the name suggests, are formulated with beginners and cost-efficiency in mind. They typically contain less pigment and more filler, resulting in slightly less vibrant colors and sometimes a chalkier finish. Brands like Winsor & Newton Winton, Gamblin 1980, and Sennelier Rive Gauche are popular choices in this category. While they are an excellent starting point for learning techniques without a hefty investment, their color intensity and archival qualities might be limited. Artist-grade paints, on the other hand, boast a higher concentration of pure pigment, ground finely and mixed with premium binders like linseed or poppy oil. This results in superior color saturation, lightfastness, and a richer, more luxurious texture. Brands such as Old Holland, Michael Harding, Winsor & Newton Professional, and Gamblin Artist's Oils are celebrated for their exceptional quality. While more expensive, a little goes a long way, and the vibrancy and longevity of your artwork will reflect this investment. Beyond grades, understanding pigments is crucial. Each pigment has unique characteristics, including opacity, transparency, and lightfastness (how resistant it is to fading over time). Manufacturers often label tubes with a 'lightfastness rating' (e.g., ASTM I, II, III), with 'I' being excellent. A basic palette might include primary colors (Cadmium Red, Cadmium Yellow, Ultramarine Blue), secondary colors (Viridian Green, Dioxazine Purple), earth tones (Raw Umber, Burnt Sienna), and neutrals (Titanium White, Ivory Black). However, many artists prefer to mix their own blacks and grays, and some even avoid black altogether, opting for chromatic blacks mixed from dark blues and browns. Choosing your initial palette can feel overwhelming, but a good strategy is to start with a limited palette of high-quality artist-grade primaries, a white, and an earth tone. This forces you to learn color mixing thoroughly and will serve you well in the long run. As you gain experience, you can gradually expand your collection. Remember that the quality of your pigments directly influences the luminosity and archival nature of your finished pieces. For more insights into color theory and mixing, explore resources on fundamental art principles. This foundational knowledge of paints is the first step in mastering the beautiful medium of oil painting.

Essential Brushes and Painting Surfaces for Oil Artists
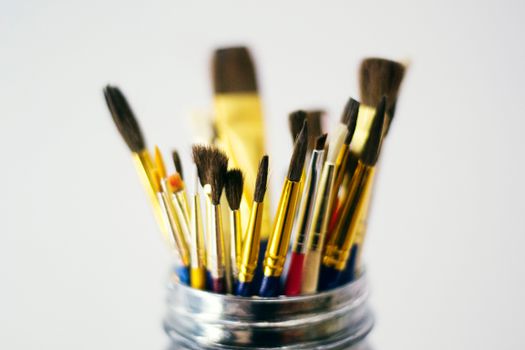
A diverse set of paintbrushes displayed in a jar, perfect for arts and crafts enthusiasts. Photo: Em Everyday Living / Pexels
Once you've selected your paints, the next critical component in your arsenal of art supplies for oil painting is your brushes and painting surfaces. The right brush can transform a hesitant stroke into a confident gesture, while the appropriate surface provides the foundation for your artistic vision. Oil painting brushes come in a bewildering array of shapes, sizes, and hair types. Generally, brushes are made from either natural hair or synthetic fibers. Natural hair brushes, typically hog bristle, are stiff and resilient, making them ideal for applying thick, impasto layers of paint and creating visible brushstrokes. They excel at moving heavy paint and are a favorite for blocking in large areas or adding texture. Softer natural hairs, like sable, are less common for oil painting due to their delicacy and cost, but can be used for fine details and smooth blending if desired. Synthetic brushes have made significant advancements in recent years, offering excellent performance and often at a more affordable price point. They are durable, retain their shape well, and clean up easily. Synthetics can mimic the characteristics of both stiff hog bristles and soft sable, making them incredibly versatile. Look for brushes with names like 'filbert,' 'flat,' 'round,' and 'bright.' Filbert brushes have an oval shape, offering a soft edge; flats have a square edge for bold strokes; rounds come to a point for detail; and brights are short, flat brushes perfect for controlled, thick applications. A good starter set might include a few filberts (sizes 4, 8, 12), a couple of flats (sizes 6, 10), and a small round (size 2 or 3) for details. Choosing the right painting surface is equally important. Oil paints require a non-absorbent, acid-free surface to prevent the oil from seeping into the support and causing degradation over time. Canvas is the most popular choice, available in cotton or linen. Linen is generally considered superior due to its strength, fine weave, and archival qualities, though it is more expensive. Canvases come pre-stretched on wooden frames or as canvas boards (panels), which are more rigid and portable. Ensure your canvas is primed with gesso (a white acrylic primer) to create a suitable surface for the oil paint. Beyond canvas, other popular surfaces include wood panels (MDF, birch plywood), which offer a very rigid and smooth surface, ideal for detailed work or when you want to avoid the flexibility of canvas. These also need to be primed with gesso, often several layers, sanded smooth between coats. Oil paper, specifically designed for oil painting, is another excellent option for studies, sketches, and practice, as it's less expensive and easily transportable. Always ensure your chosen surface is properly primed to protect your artwork for years to come. Investing in a variety of brushes and experimenting with different surfaces will help you discover what best suits your individual painting style and desired effects.

Solvents, Mediums, and Essential Studio Accessories
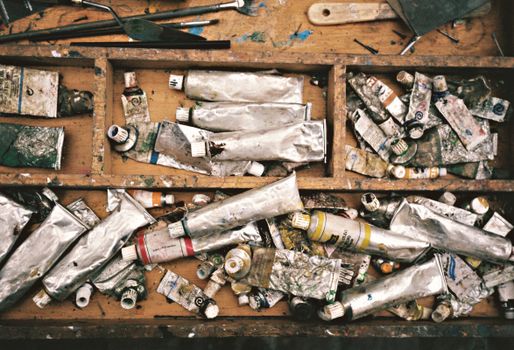
Rustic wooden drawer filled with squeezed paint tubes, brushes, and artistic tools, showcasing creativity. Photo: DΛVΞ GΛRCIΛ / Pexels
Beyond paints and brushes, a successful oil painting practice necessitates a range of solvents, mediums, and crucial studio accessories. These items facilitate paint manipulation, aid in cleaning, and ensure a safe and organized workspace. Understanding their purpose and proper use is fundamental to achieving desired effects and maintaining the longevity of your materials. Solvents are primarily used for thinning oil paints and cleaning brushes. Traditionally, turpentine was the go-to solvent, known for its strong odor and excellent thinning properties. However, its fumes can be irritating, prompting many artists to switch to odorless mineral spirits (OMS) like Gamsol by Gamblin. OMS is less toxic and has a much milder odor, making it a safer choice for studio use, especially in less-ventilated spaces. When thinning paint, remember the 'fat over lean' rule: subsequent layers of paint should contain more oil (or less solvent) than the previous layers to prevent cracking as the painting dries. Mediums are additives mixed with oil paints to alter their consistency, drying time, transparency, or gloss. Linseed oil, poppy oil, and walnut oil are common drying oils that can increase fluidity, gloss, and slow drying. Alkyd mediums (e.g., Galkyd, Liquin) are popular for their ability to speed up drying times, increase transparency, and create a smooth, enamel-like finish. Impasto mediums, like Gamblin's Solvent-Free Gel, add body and texture to paint without extending drying time excessively. Experimenting with different mediums will open up a world of possibilities for textural effects and glazing techniques. No oil painting setup is complete without a few essential accessories. A palette is indispensable for mixing colors. Options range from traditional wooden palettes (which need to be conditioned with oil) to glass, plastic, or disposable paper palettes. Glass palettes are easy to clean and provide a true color mixing surface. Palette knives are not just for mixing; they can also be used to apply paint directly to the canvas, creating bold, textured strokes. For cleaning brushes, brush cleaner (often a citrus-based solvent or specialized soap) is vital to remove paint residue effectively and preserve brush hairs. A sturdy easel, whether a studio easel for large works or a portable field easel for outdoor painting, will provide stability and comfort. Rags or paper towels are continuously needed for wiping brushes and excess paint. Lastly, a well-ventilated space is paramount when working with solvents and certain mediums; an open window or an air purifier can make a significant difference. Explore more about studio setup and organization through various online art communities. Properly equipped, your studio becomes a sanctuary for creativity, allowing you to focus on the art itself.

Tips for Beginners and Common Mistakes to Avoid

A young female artist painting on a canvas in an art studio filled with creative works. Photo: Antoni Shkraba / Pexels
For those just starting their journey with art supplies for oil painting, a few key tips and awareness of common pitfalls can make the learning process much smoother and more enjoyable. Oil painting is a rewarding medium, but it comes with its own set of considerations. **Tips for Beginners:** * **Start with a Limited Palette:** Instead of buying every color, begin with a basic set of primaries (red, yellow, blue), white, and an earth tone (like burnt sienna). This approach forces you to learn color mixing thoroughly, which is a fundamental skill. You'll be surprised by the range of colors you can create. * **Understand the 'Fat Over Lean' Rule:** This is arguably the most crucial rule in oil painting. It dictates that each subsequent layer of paint must be more flexible (contain more oil or less solvent) than the layer beneath it. Ignoring this rule can lead to cracking and delamination of paint layers over time. Think of it as building a painting from thin, solvent-heavy layers to thicker, oil-rich layers. * **Work in a Well-Ventilated Area:** Many solvents and some mediums can emit fumes. Ensure your studio or workspace has adequate airflow to protect your health. Odorless mineral spirits (OMS) are a great alternative to traditional turpentine for reducing fumes. * **Clean Your Brushes Properly:** After each painting session, thoroughly clean your brushes. Residual paint can harden and ruin the bristles. Use a brush cleaner or soap specifically designed for oil paints. Proper cleaning extends the life of your valuable brushes. * **Embrace the Drying Time:** Unlike acrylics, oil paints dry slowly. Don't fight it! This extended drying time is a unique advantage, allowing for extensive blending, reworking, and subtle color transitions. Be patient and enjoy the process. * **Experiment with Mediums:** Once comfortable with basic painting, start experimenting with different oil painting mediums. They can alter the paint's texture, transparency, gloss, and drying time, opening up new creative possibilities. **Common Mistakes to Avoid:** * **Over-Thickening Early Layers:** Applying very thick layers of paint at the beginning of a painting can lead to cracking as the underlying layers take longer to dry and shrink. * **Using Too Much Solvent:** While solvents thin the paint, using too much can make the paint 'underbound,' meaning there isn't enough oil to hold the pigment together, resulting in dull, brittle paint films. * **Painting on Unprimed Surfaces:** Oil will eventually rot unprimed canvas or paper. Always use a properly gessoed surface to protect your artwork and ensure its longevity. * **Neglecting Brush Care:** Dirty or improperly cleaned brushes will quickly become unusable, leading to frustration and unnecessary expense. * **Comparing Yourself to Others:** Every artist's journey is unique. Focus on your own progress and enjoyment rather than comparing your nascent skills to seasoned professionals. Practice consistently, and you will see improvement. * **Not Protecting Your Finished Work:** Once dry, oil paintings should be varnished to protect them from dirt, UV light, and environmental damage. Wait at least six months to a year for the paint to fully cure before varnishing. By keeping these tips and avoiding these common mistakes, beginners can lay a strong foundation for a fulfilling oil painting practice.

Comparison

FeatureBest Option (Artist Grade)Alternative 1 (Student Grade)Alternative 2 (Water-Mixable Oils)
Pigment LoadHigh concentration, vibrantLower concentration, fillersModerate, good vibrancy
Drying TimeSlow (days to weeks)Slow (days to weeks)Faster than traditional (1-3 days)
Blending/WorkabilityExcellent, long open timeGood, but can be less smoothVery good, cleans with water
Archival QualitySuperior, excellent lightfastnessGood, but varies by brandGood, but newer technology
CostHighModerateModerate to High
Required SolventsYes (OMS, Turpentine)Yes (OMS, Turpentine)No (water for thinning/cleaning)

What Readers Say

"As a beginner, this guide to art supplies for oil painting was a lifesaver. It helped me pick out exactly what I needed without feeling overwhelmed, and my first painting turned out better than I expected!"

Sarah J. · Austin, TX

"The breakdown of artist vs. student grade paints was incredibly helpful. I decided to invest in artist-grade basics, and the difference in color vibrancy is truly remarkable. My art has genuinely improved."

Mark D. · Portland, OR

"I used to struggle with cracking in my oil paintings. Following the 'fat over lean' rule from this guide has completely eliminated that issue. My paintings now dry perfectly without any problems."

Emily R. · Chicago, IL

"The information on solvents and mediums was thorough, though I still prefer traditional turpentine for its feel. However, the safety tips and alternatives for ventilation were very valuable for my home studio."

David L. · Miami, FL

"I've been painting for years but always felt like my brushes weren't quite right. This guide clarified brush types and materials, leading me to a new set that perfectly matches my impasto style. Such a game-changer!"

Jessica M. · Denver, CO

Frequently Asked Questions

What are the absolute must-have art supplies for oil painting for a beginner?

For a beginner, the absolute must-haves include a basic set of artist-grade oil paints (primary colors, white, and an earth tone), a few synthetic brushes (filbert, flat, round), odorless mineral spirits for thinning and cleaning, a palette, and primed canvas panels or oil paper. This core kit allows you to explore the medium without significant upfront investment.

Is oil painting too difficult for a complete beginner?

No, oil painting is not too difficult for a complete beginner! While it has a learning curve, its slow drying time makes it very forgiving, allowing ample time for blending and corrections. Starting with good basic supplies and focusing on fundamental techniques will build your confidence quickly.

How do I clean my oil painting brushes effectively?

To clean oil painting brushes, first wipe off as much excess paint as possible with a rag or paper towel. Then, swirl the brush in odorless mineral spirits or a specialized brush cleaner. Finally, wash the brush thoroughly with warm water and soap (like artist's brush soap or even dish soap), rinsing until all paint residue is gone. Reshape the bristles and let them dry flat or brush-side-up.

How much should I expect to spend on a basic set of art supplies for oil painting?

A basic set of quality student-grade art supplies for oil painting can range from $50-$150. If you opt for a limited palette of artist-grade paints and good quality synthetic brushes, expect to spend closer to $150-$300. Remember, investing in quality often means better results and longer-lasting materials.

Are water-mixable oil paints a good alternative to traditional oils?

Yes, water-mixable oil paints are an excellent alternative, especially for those sensitive to solvents or working in spaces without good ventilation. They offer similar characteristics to traditional oils but can be thinned and cleaned with water. While they may have a slightly different feel or drying time, they are a fantastic option for many artists.

Who should consider using artist-grade oil paints over student-grade?

Artists who are serious about the longevity and vibrancy of their work, or those painting professionally, should consider artist-grade oil paints. The higher pigment load and superior lightfastness ensure your colors remain true and your artwork endures for centuries. Beginners who want the best possible experience from the start might also find the investment worthwhile.

What are the safety concerns when using oil painting supplies?

The main safety concerns revolve around solvents and some pigments. Always ensure good ventilation in your workspace to avoid inhaling fumes from turpentine or mineral spirits. Some pigments can be toxic if ingested, so avoid eating or drinking while painting and wash your hands thoroughly. Dispose of solvent-soaked rags properly to prevent fire hazards.

What's the next big trend in art supplies for oil painting?

While traditional oil painting remains timeless, a growing trend is the development of more eco-friendly and non-toxic alternatives. This includes solvent-free mediums, water-mixable oils with improved performance, and a greater emphasis on sustainably sourced pigments and materials. Artists are increasingly seeking healthier options without compromising quality.

Ready to bring your artistic visions to life? With the right art supplies for oil painting, you're equipped to explore a world of rich colors and timeless techniques. Start your creative journey today and discover the endless possibilities of this enduring medium.

Topics: art supplies for oil paintingoil painting materialsbeginner oil painting kitbest oil paintsoil painting brushes
Leo List

IE Escorts NO Escorts US Escorts NZ Escorts AU Escorts
Brampton weed
Adultwork EstrelaBet Vai de Bet R7 Bet Betão Galera Bet Rainbet Bet9ja Shop SportyBet BetKing Sisal Loto Foot Hollywoodbets YesPlay Odibets RushBet Jugabet BetWarrior BetCity MSport betPawa Fortebet